

Creating Faux Copper Metal Roofs: A DIY Guide
Copper metal roofs are renowned for their durability, longevity, and timeless elegance.
However, installing a genuine copper roof can be prohibitively expensive for many homeowners.
Fortunately, there’s a cost-effective alternative: faux copper metal roofs.
By employing clever techniques and materials, you can achieve the aesthetic appeal of copper without breaking the bank.
In this comprehensive guide, we’ll walk you through the process of creating your own faux copper metal roof, allowing you to enhance your home’s beauty while saving money in the process.
Materials and Tools:
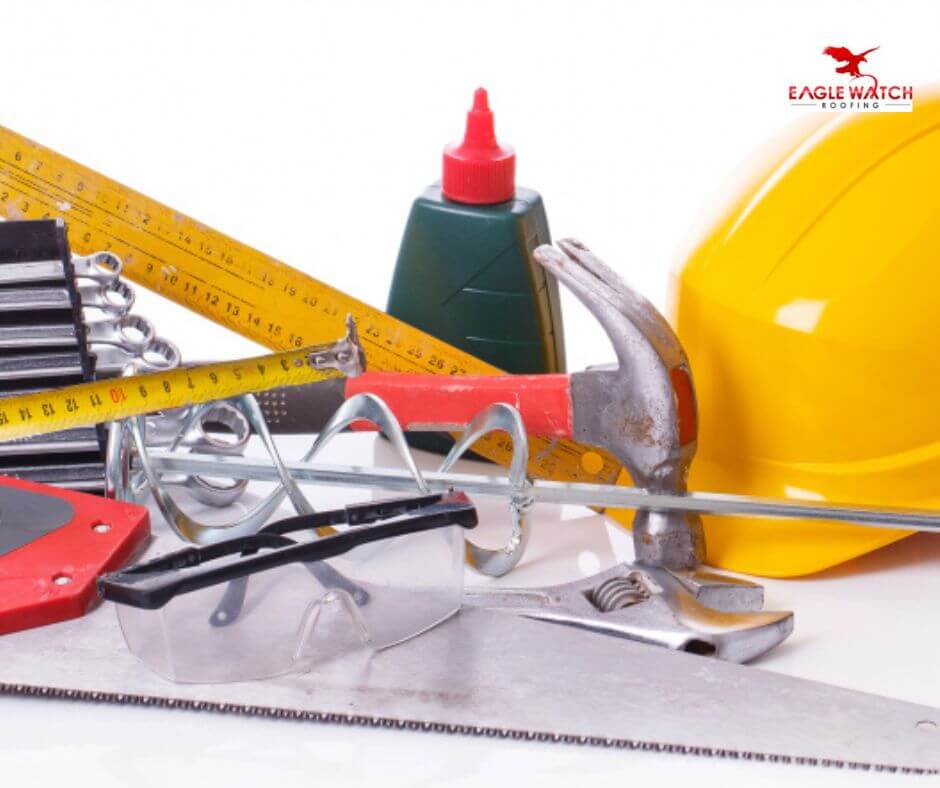
Before starting, gather the necessary materials and tools, including corrugated metal sheets, copper metallic spray paint, metal primer, clear sealant, painter’s tape, sandpaper, paintbrushes, and safety gear. You’ll need:
Corrugated metal sheets
Copper metallic spray paint
Metal primer
Clear sealant
Painter’s tape
Sandpaper
Paintbrushes
Safety gear (gloves, goggles, mask)
Surface Preparation
Start by preparing the surface of your roof.
Clean it thoroughly to remove any dirt, debris, or rust.
Use sandpaper to smoothen any rough areas.
Apply a layer of metal primer evenly across the entire surface and allow it to dry completely.
Cleaning: Thoroughly clean the roof surface using a suitable cleaner to remove dirt, debris, and any existing coatings.
This step is crucial for ensuring proper adhesion of the primer and paint later on.
Repairing: Inspect the roof for any signs of damage, such as rust or corrosion.
Use appropriate tools and materials to repair any issues before proceeding with the painting process.
Smoothing: Use sandpaper or a wire brush to smooth out any rough areas or imperfections on the surface.
This step helps create a uniform base for the primer and paint to adhere to, ensuring a smooth and professional finish.
Priming: Apply a layer of metal primer evenly across the entire surface of the roof.
The primer helps improve paint adhesion and durability, providing a solid foundation for the subsequent layers of paint.
Painting Technique

Once the primer is dry, it’s time to apply the copper metallic spray paint.
Shake the can thoroughly and spray an even coat of paint over the metal surface.
Be sure to follow the manufacturer’s instructions for optimal results.
Apply multiple coats as needed, allowing each coat to dry before applying the next one.
Preparation: Shake the can of copper metallic spray paint thoroughly before use to ensure proper mixing of the paint.
Read and follow the manufacturer’s instructions on the can for best results.
Application: Hold the spray can approximately 6-8 inches away from the surface and apply the paint in smooth, overlapping strokes.
Ensure even coverage across the entire roof surface, working from one end to the other.
Multiple Coats: Apply multiple coats of paint as needed to achieve the desired color depth and coverage.
Allow each coat to dry completely before applying the next one, following the recommended drying times provided by the manufacturer.
Consistency: Maintain a consistent spraying distance and speed to avoid uneven coverage or drips.
Work methodically to ensure uniformity in the paint application process.
Creating Texture
To mimic the authentic look of copper, you can add texture to the painted surface.
Use a crumpled piece of paper or a sponge to dab on additional layers of paint in random patterns.
This will create depth and variation, replicating the natural patina of aged copper.
Technique: After applying the base coats of paint, use a crumpled piece of paper, sponge, or other textured material to add depth and variation to the surface.
Dab or stipple additional layers of paint in random patterns to mimic the natural patina of aged copper.
Experimentation: Experiment with different techniques and tools to achieve the desired texture and appearance.
Test the effects on a small, inconspicuous area of the roof before applying them to the entire surface.
Layering: Layering multiple shades of copper metallic paint can enhance the realism of the faux copper finish, creating depth and dimension similar to that of genuine copper.
Layering Techniques: In addition to using crumpled paper or sponges, experiment with layering techniques to enhance texture.
Apply lighter and darker shades of copper metallic paint in strategic areas to simulate natural variations and highlights found in aged copper surfaces.
Sealing the Surface
Once you’re satisfied with the texture and appearance of the faux copper finish, seal the surface with a clear sealant.
This will protect the paint from weathering and ensure long-lasting durability.
Apply the sealant evenly across the entire roof surface and allow it to dry completely.
Protection: Once the paint has dried completely, apply a clear sealant evenly across the entire surface of the roof.
The sealant provides protection against weathering, UV rays, and corrosion, prolonging the life of the faux copper finish.
Application: Use a paint brush or sprayer to apply the sealant in smooth, even strokes, ensuring complete coverage.
Pay special attention to seams, edges, and any areas prone to water accumulation.
Drying Time: Allow the sealant to dry completely according to the manufacturer’s instructions before exposing the roof to moisture or harsh weather conditions.
Weather Resistance: Ensure that the clear sealant used is specifically formulated to withstand harsh weather conditions, including rain, snow, and UV exposure.
This provides long-lasting protection for the faux copper finish, preserving its appearance and durability over time.
Finishing Touches
After the sealant has dried, remove any painter’s tape and touch up any areas as needed.
Inspect the entire roof for any imperfections and make corrections as necessary.
Your faux copper metal roof is now ready to be admired!
Removal of Tape: Carefully remove any painter’s tape from the roof surface once the sealant has dried completely.
Ensure that no tape residue is left behind, as it can detract from the appearance of the finished roof.
Inspection: Thoroughly inspect the entire roof surface for any imperfections, such as drips, runs, or areas of uneven texture.
Touch up any areas as needed to achieve a flawless finish.
Final Evaluation: Step back and admire your handiwork, appreciating the transformation of your roof into a stunning faux copper metal masterpiece.
Take pride in your DIY achievement and enjoy the enhanced beauty of your home’s exterior.
Conclusion
Transforming your roof with a faux copper metal finish is a rewarding DIY project that can significantly enhance the aesthetic appeal of your home.
By following the steps outlined in this guide, you can achieve professional-looking results at a fraction of the cost of a genuine copper roof.
With the right materials, tools, and techniques, you’ll enjoy the timeless beauty of copper metal roofs while saving money in the process.
FAQs:
Q: How long will a faux copper metal roof last?
A: When properly installed and maintained, a faux copper metal roof can last for many years, providing durability and aesthetic appeal.
Q: Can I install a faux copper metal roof myself?
A: Yes, with the right materials and tools, installing a faux copper metal roof can be a DIY-friendly project. However, it’s essential to follow proper safety precautions and techniques.
Q: Will the faux copper finish fade over time?
A: While the faux copper finish is designed to be durable and long-lasting, some fading may occur over time due to exposure to the elements. Regular maintenance and resealing can help prolong the finish’s lifespan.
Q: How does the cost of a faux copper metal roof compare to a genuine copper roof?
A: A faux copper metal roof is significantly more affordable than a genuine copper roof, making it a cost-effective alternative for homeowners seeking the look of copper without the high price tag.
Q: Can I apply a faux copper finish to any type of roof material?
A: While faux copper finishes are typically applied to metal roofs, they can also be used on other materials such as asphalt shingles or wooden shingles. However, it’s essential to ensure proper adhesion and compatibility with the existing roof material.
Q: Will a faux copper metal roof increase the energy efficiency of my home?
A: While a faux copper metal roof may not significantly improve energy efficiency on its own, it can contribute to overall energy savings by reflecting sunlight and reducing heat absorption, especially when combined with proper insulation and ventilation.
Q: How do I maintain a faux copper metal roof?
A: Regular maintenance is key to preserving the appearance and integrity of a faux copper metal roof. This includes periodic cleaning to remove dirt and debris, as well as resealing the surface as needed to protect against weathering and corrosion.
Q: Can I walk on a faux copper metal roof?
A: While faux copper metal roofs are durable, it’s best to avoid walking on them whenever possible to prevent damage to the finish and underlying materials. If maintenance or repairs are necessary, use caution and walk only on designated walkways or support structures.
Q: Will a faux copper metal roof affect the resale value of my home?
A: A well-executed faux copper metal roof can enhance the curb appeal and overall value of your home, making it more attractive to potential buyers. However, the impact on resale value may vary depending on market trends and individual preferences.
Q: Are there any environmental benefits to choosing a faux copper metal roof?
A: Faux copper metal roofs are often made from recycled materials and can be recycled at the end of their lifespan, reducing environmental impact compared to traditional roofing materials. Additionally, their durability and energy-saving properties can contribute to sustainability efforts over time.